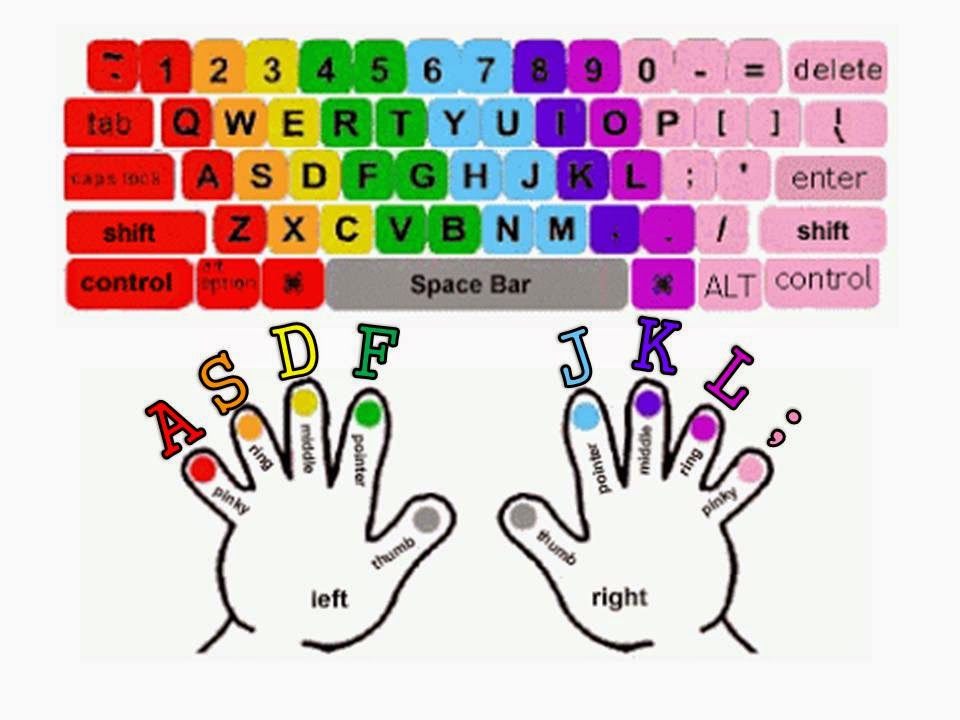
Keyboard Finger Placement Chart
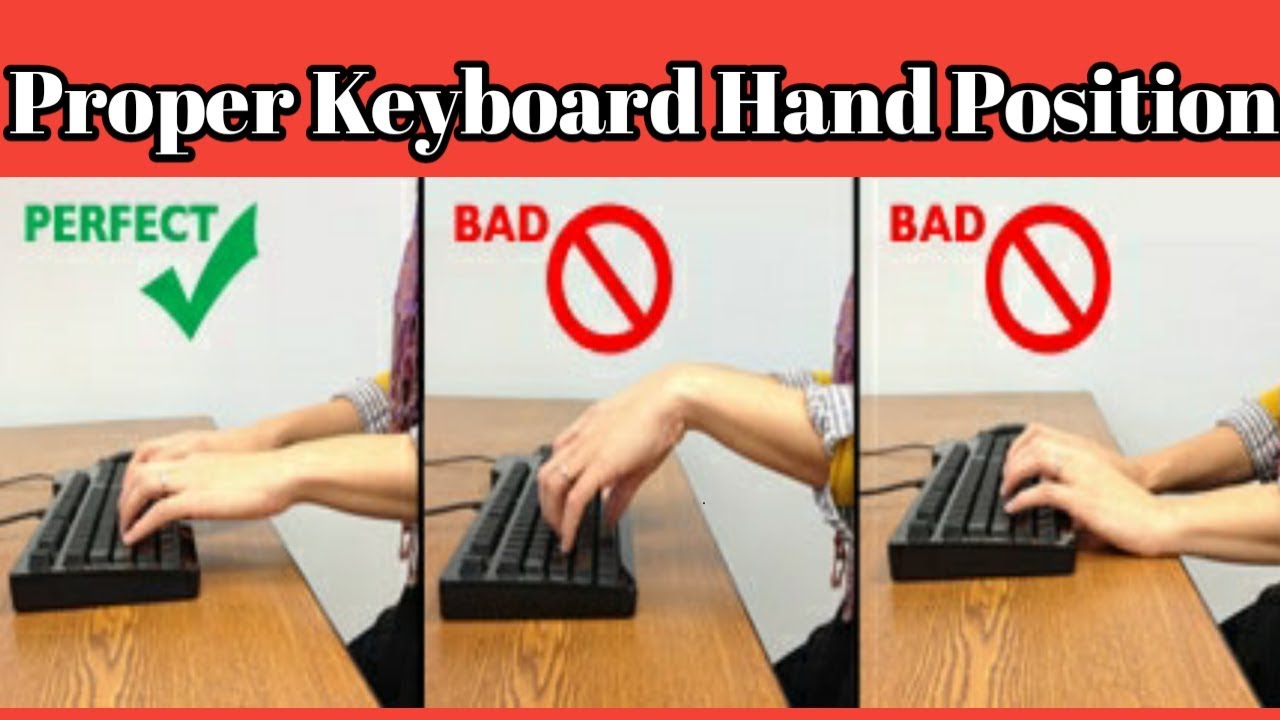
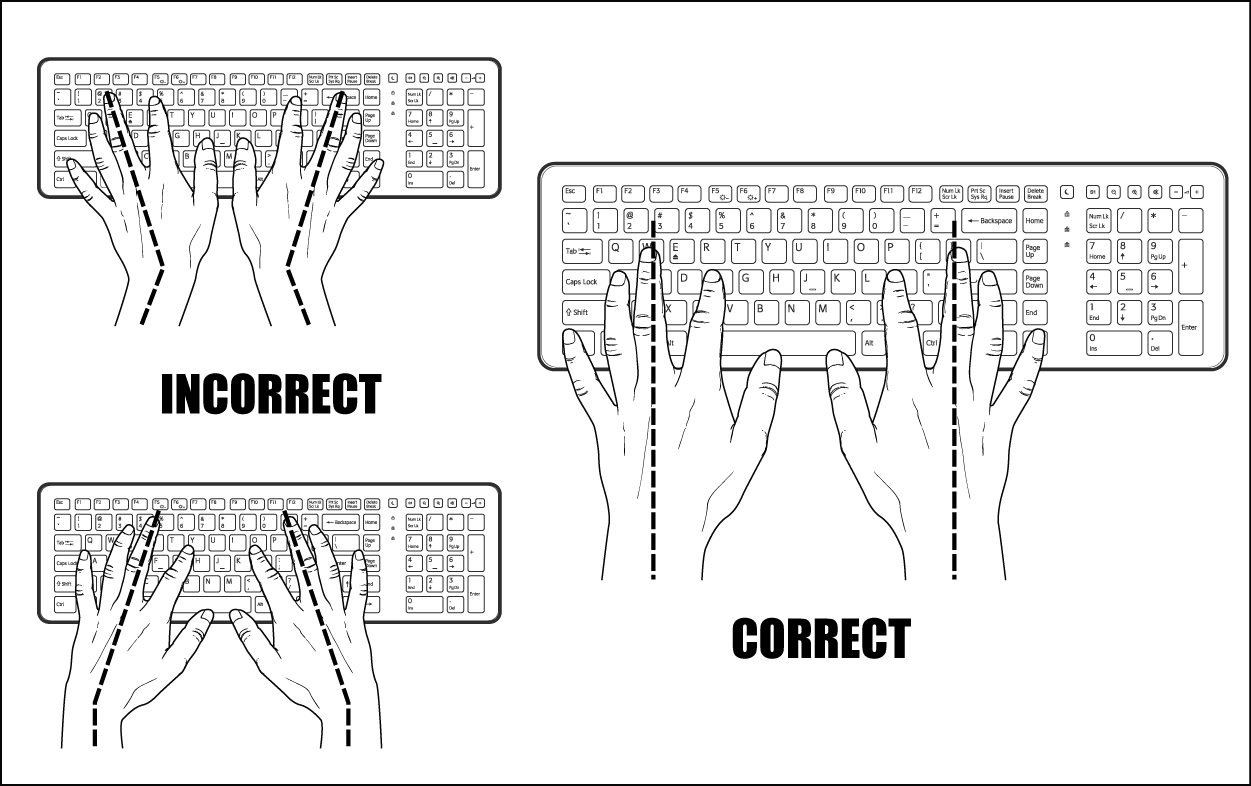
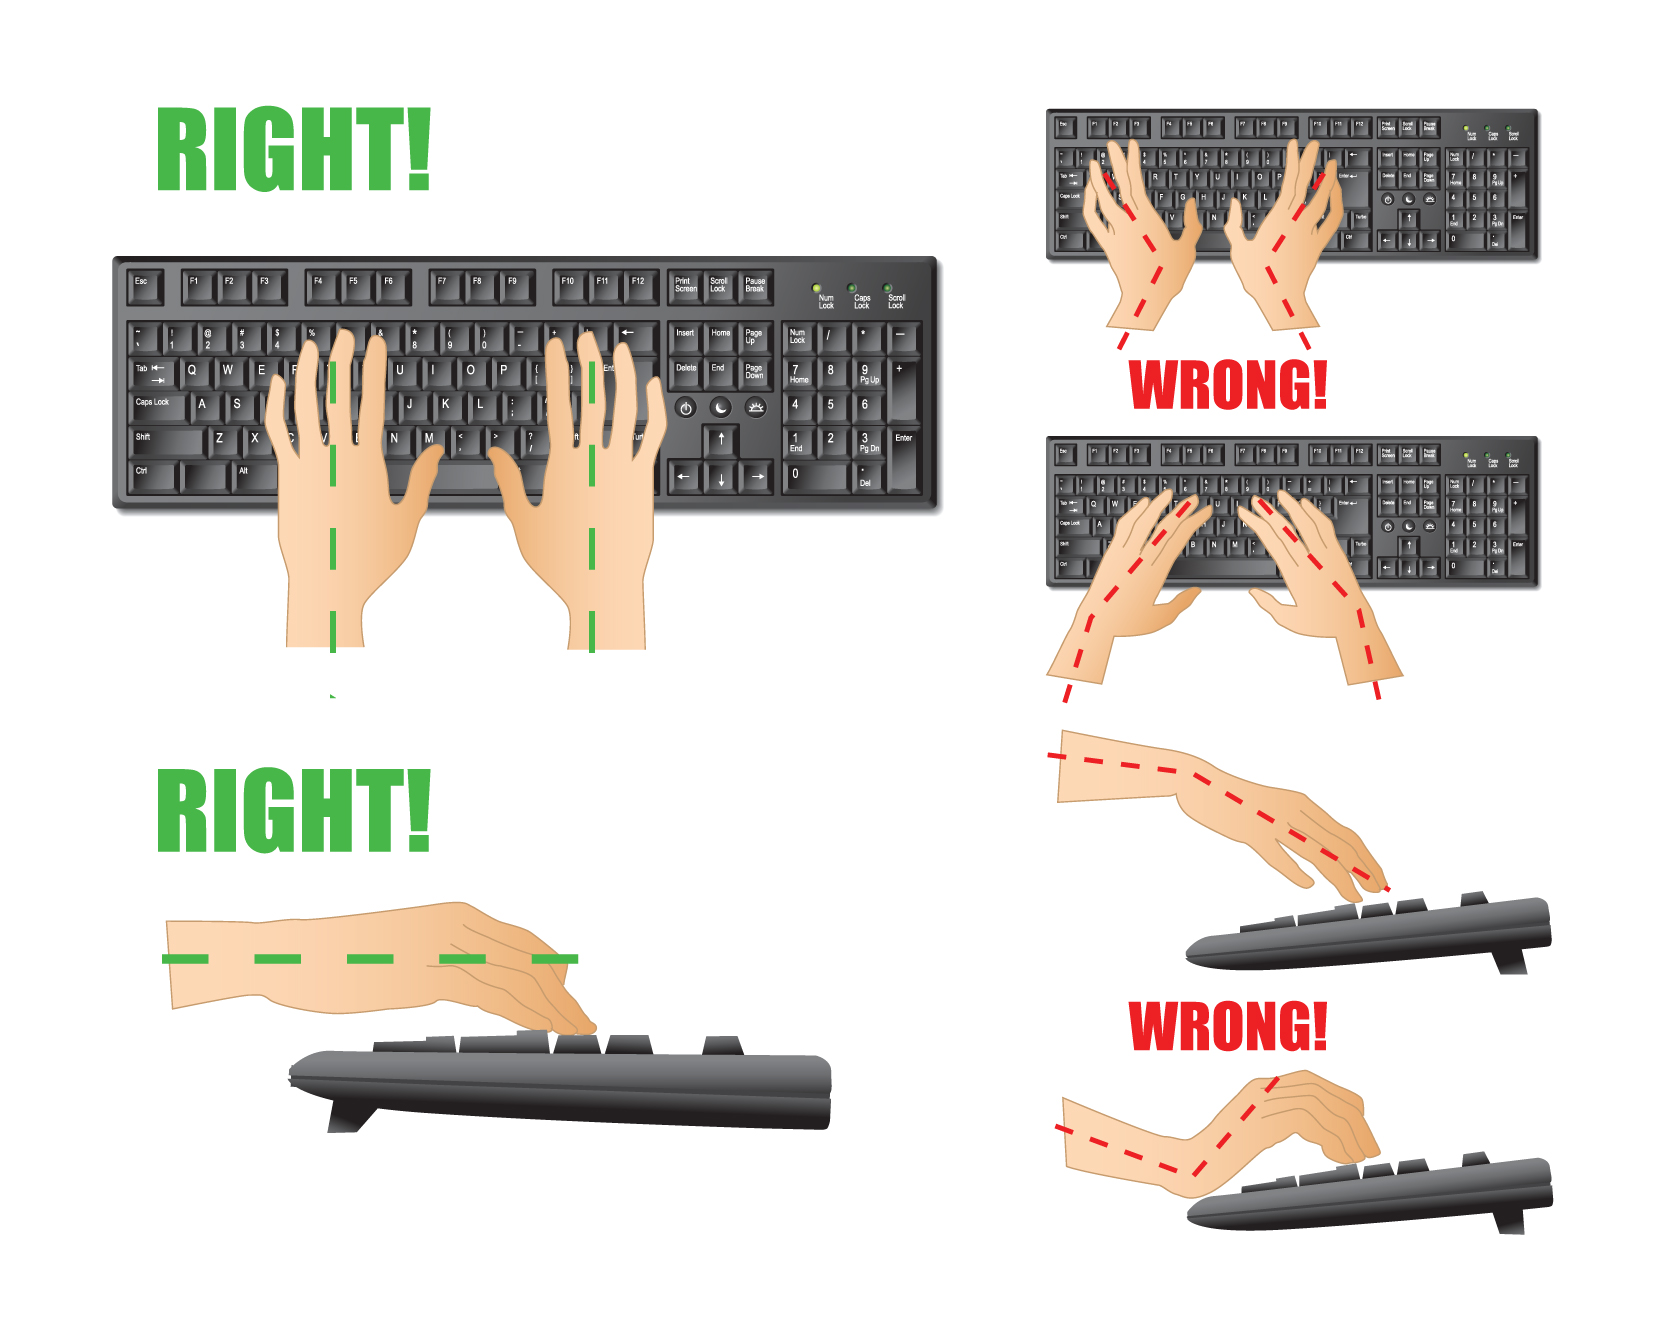
Proper Keyboard Position Using a computer keyboard that is positioned improperly may cause or contribute to carpal tunnel syndrome. To prevent injury, the user should keep the wrist in a neutral position. That is, the line from the hand to the forearm should be straight. The hand may be slightly lower than the forearm.

How to Put Your Hands on a Keyboard YouTube
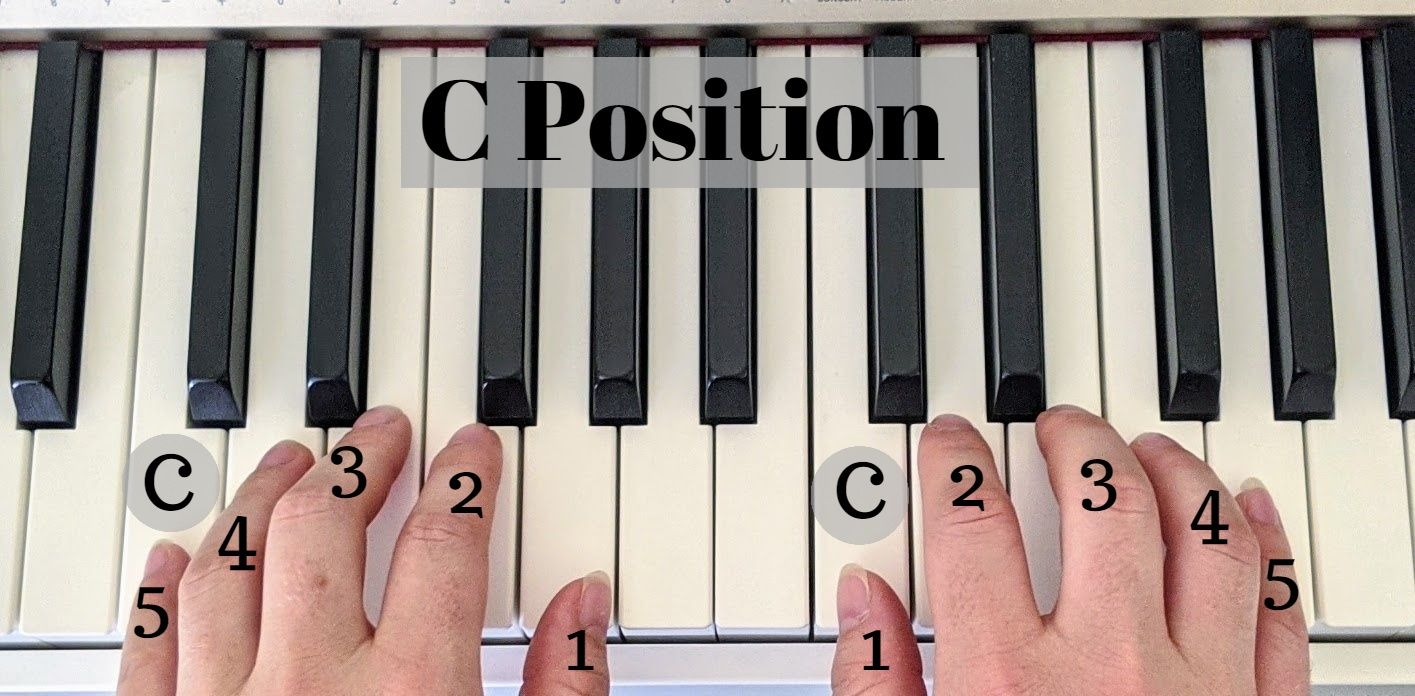
Step 1: To begin with, start with your right hand. Keeping your hand and fingers relaxed, place your right hand lightly on the keys, with the left side of your thumb on middle C and the tips of your fingers resting on the next four white keys (that's D, E, F and G) to the right.

How to Position Hands on a Keyboard 10 Steps (with Pictures)
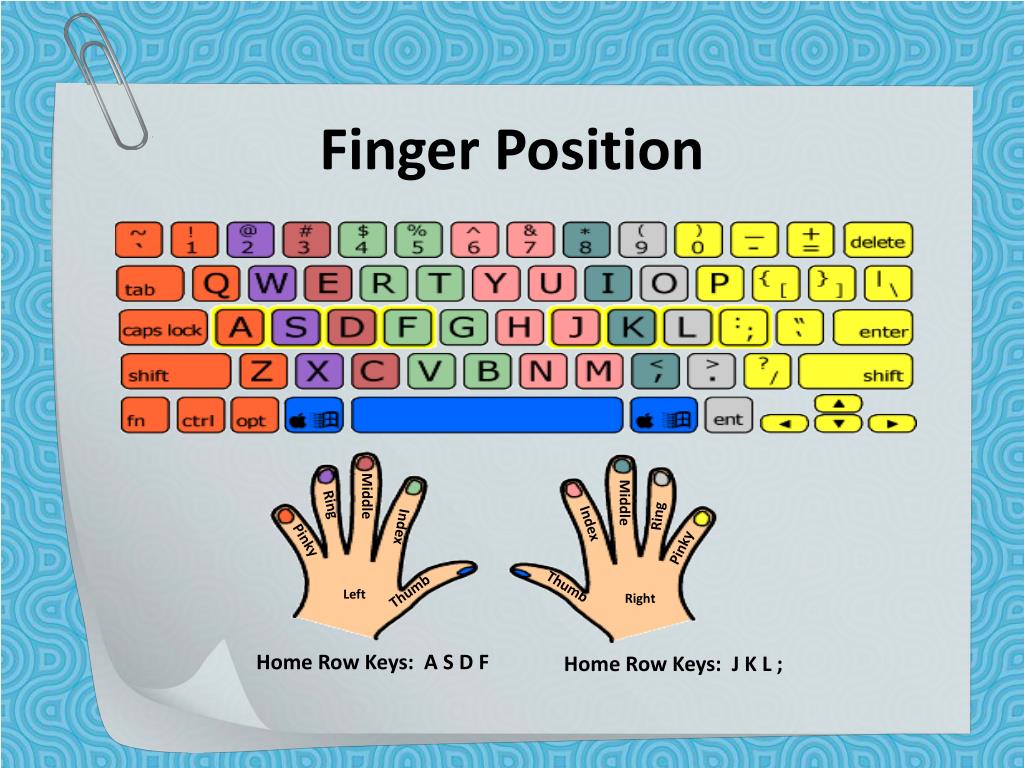
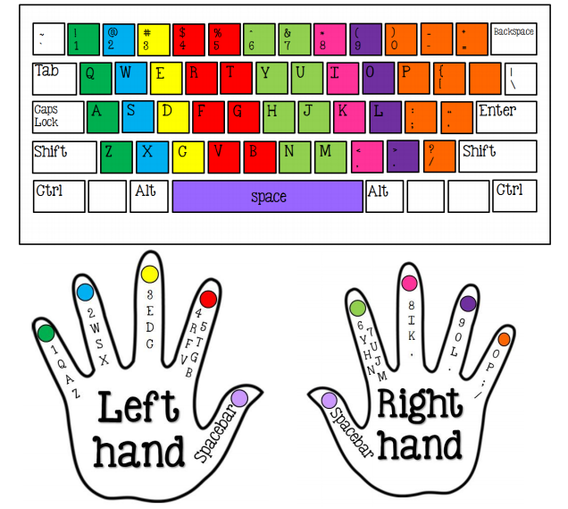
The Basic Finger Placement on The Keyboard. Position your fingers on the home row keys. Left hand: pinky on 'A', ring finger on 'S', middle finger on 'D', index finger on 'F'. Right hand: pinky on the semicolon key (';'), ring finger on 'L', middle finger on 'K', index finger on 'J'. Rest your thumbs on the space.
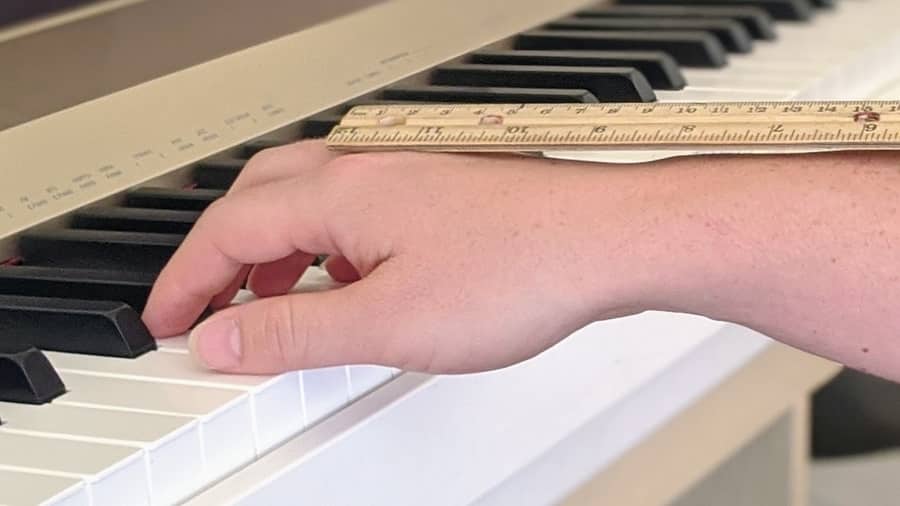
Hand Position on the Piano Where and How to Do it Correctly
1 Fix your keyboard so it stands up. Fold-out the keyboard stand from the back top corners of the keyboard. Doing so improves typing and decreases chances that you'll injure your hands after lots of use of typing at the keyboard. 2 Think about the curvature of your hands as you place them on the keyboard.
Typing ki proper Keyboard Hand Position. YouTube
Best Ergonomic Position For a Keyboard You'd be surprised how many things can influence a good -- or bad -- ergonomic office setup. Check your employees' or students': Position relative to the center of the keyboard and screen (s) Height comparative to the keyboard Distance keyboard to screen Distance from keyboard to chair

How to Position Hands on a Keyboard 10 Steps (with Pictures)
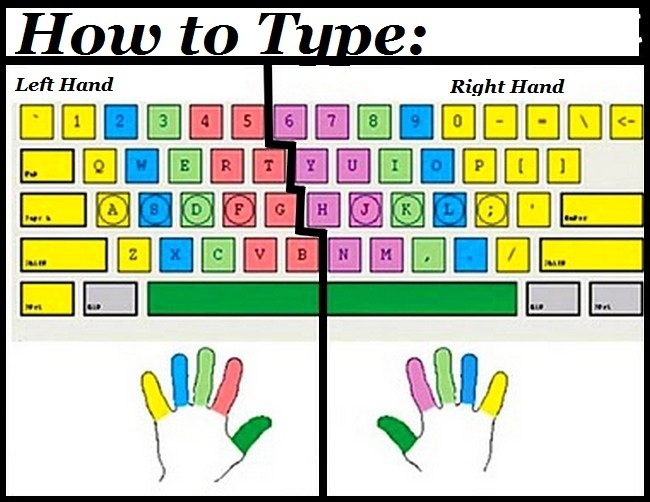
The basic concept of fast typing is quickly explained: Your fingers take up a fixed starting position, from where you can reach any key you need. Your left fingers are placed on the keys A, S, D and F. Your right fingers are on the keys J, K, L and semicolon. Your thumbs are on the space bar. Tip.
Hand Position on the Piano Where and How to Do it Correctly
Place keyboard just below elbow level Elbows should be in an open angle (90 - 110 degrees). This relaxes your forearms and shoulders. Keyboard should be flat on the desk, or sloping gently away from you (negative tilt). A keyboard tray or ergonomic keyboard can be used to achieve a negative tilt in your keyboard.
Here's How to Position Your Hands When You Use a Computer so They Don't
Correct Hand Placements When Using a Keyboard & Mouse Photos provided by Dr. Daluiski HSS' Dr. Aaron Daluiski shows how to correctly use a keyboard and computer mouse, Here's How to Position Your Hands When You Use a Computer so They Don't Hurt

Learning how to type on keyboard with proper finger position
Read on to learn how to properly position your hands on a keyboard for gaming. Why Hand Placement Matters When Gaming.. Proper hand placement can even reduce the overall noise level of the keyboard. Ergonomics and Different Types of Keyboards. When it comes to gaming on a keyboard, the type of keyboard used is an important factor in.
PPT Keyboarding Skills PowerPoint Presentation, free download ID
The fingers will be placed on the A, S, D, F, and J, K, L keys along with the spacebar key. If you're concerned about how the placement of the fingers would go, let's take a look at it. Left-hand Placement The pinky finger of the left hand would go on the A key. The ring finger would go on the S key. The middle finger would be placed on the D key.

How to Position Hands on a Keyboard 10 Steps (with Pictures)
F and J keys is where you should put your index fingers. The other fingers should be positioned on keys: A, S, D (left hand) and K, L, ; (right hand). From the very start you should try to develop the habit of positioning your fingers back in the home row after stroking any other key.

Learn the basics of touch typing with KeyBlaze Typing tutorial, Touch
Basic finger positioning This lesson will teach you the keys to became a typing master. On this lesson you will learn the three basic rules you should always remember and and the basic hand positioning, and you will also start practicing with the first block of exercises. Start the lesson
How To Touch Type The Correct Finger Positions For Alphabetical Keys
Adjust your chair and keyboard height so your elbows are at a 90-degree angle and your arms are close to your sides. Your arms should be hanging in a relaxed posture. If your shoulders are hunched toward your ears, raise your chair height or lower your keyboard to maintain an optimal arm's length. Wrists and Hands
What is the Correct Hand Position for Typing? The Nature Hero
Maintain a straight wrist, fingers bent over the keys, and thumbs dangling close to the spacebar. Your wrists ought to be parallel to and hovering above the keyboard. Make sure when your hands land on the keyboards, the wrists are straight but not planted on the desk surface.
Increase Your Typing Speed 10 Tips On How To Type Faster
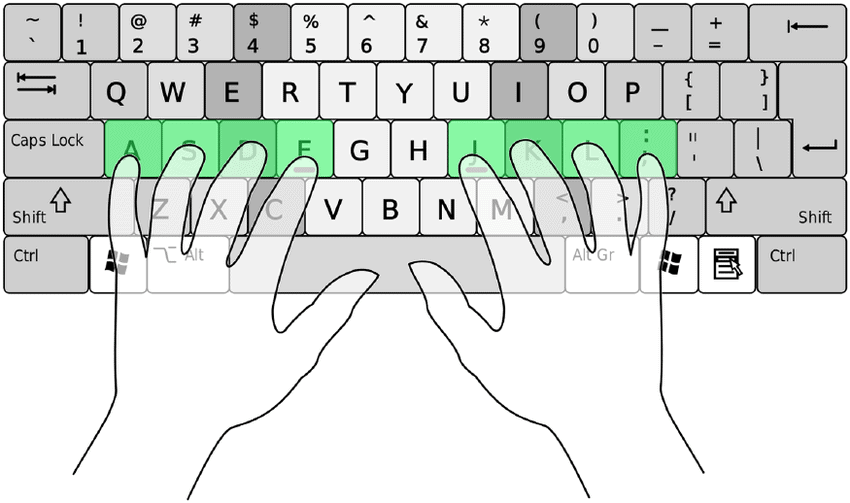
Hand positioning The next step, after reading the three key points of typing, is to learn how your hands and fingers should be positioned on the keyboard. Look carefuly at the next picture to see how your hands and fingers should be positioned. Each of your fingers should rest on one key.
Keyboarding Kemp's 21st Century Lab
Thumbs should rest lightly on the spacebar. Download Printable: proper-finger-placement-on-the-keyboard.pdf. The left-hand fingers should be placed on the A, S, D, and F keys and the right-hand fingers should be placed on the J, K, L, and ; keys. These keys are called "the home row" keys. K5 Technology Lab.